간단한 로그인 폼 만들기 #1 : 구조 만들기
간단한 로그인 폼 만들기 #1 : 구조 만들기
아이디, 비밀번호 입력란과 로그인 버튼이 있는 간단한 로그인 폼을 만들어 보려고 한다.
CSS 활용 예시로나 볼만한 아주 간단한 디자인이기 때문에 기능적인 면은 참고가 어렵다.
HTML/CSS를 이용해 기본적인 구조를 만들고 자바스크립트로 간단한 유효성 검사를 진행할 예정이다.

기본적인 HTML 구조
<!DOCTYPE html>
<html lang="en">
<head>
    <meta charset="UTF-8">
    <meta name="viewport" content="width=device-width, initial-scale=1.0">
    <title>loginForm</title>
</head>
<body>
    <form class="container">
        <p>Login</p>
        <label for="username">
            <input type="text" id="username" name="username" placeholder="아이디">
        </label>
        <label for="password">
            <input type="password" name="password" placeholder="비밀번호">
        </label>
        <button type="submit" class="btnLogin">로그인</button>
    </form>
</body>
</html>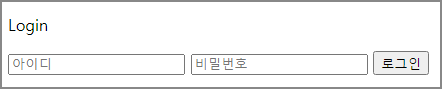
- 기본적으로 필요한 Login 글귀, 아이디 / 비밀번호 입력란, 로그인 버튼을 생성한다.
- 아이디, 비밀번호 입력란은 웹 접근성 향상을 위해 label 태그와 함께 사용하는 것이 좋다.
- 로그인은 기본적으로 계정 정보를 서버에 보내야 하기 때문에 버튼 타입은 submit으로 지정한다.
- 나중에 자바스크립트로 유효성 검사를 하기 위해 입력 태그엔 name 속성을 함께 지정해 둔다.
CSS #1 : 컨테이너 꾸미기
- loginForm.css 파일 생성 후 form 태그의 CSS 코드를 입력한다.
- loginForm.html 파일의 head 태그 안에 css 파일을 링크로 연결한다.
/* loginForm.css */
.container {
    width : 300px;
    height : 280px;
    border : 1px solid black;
    border-radius : 30px;
    background-color : rgb(255, 235, 197);
    padding : 0px 15px;
    text-align : center;
    box-sizing : border-box;
    margin : 100px auto;
}
<!-- loginForm.html -->
<head>
<meta charset="UTF-8">
<meta name="viewport" content="width=device-width, initial-scale=1.0">
<title>Login Form</title>
<link rel="stylesheet" href="loginForm.css">
</head>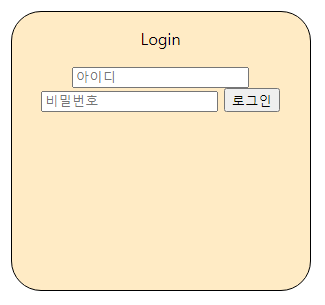
- form 태그의 클래스 선택자로 틀을 생성했다.
- padding 속성으로 상하 0px, 좌우 15px의 크기를 적용했지만 Login 글씨 위에 여백이 있는 이유는 Login 글씨를 p 태그로 감쌌기 때문이다. p 태그는 기본적으로 태그 자체가 지니고 있는 여백이 있다.
- 폼에 margin 값을 적용한 이유는 웹 브라우저상에서 보기 편하도록 로그인 창을 가운데에 위치시키기 위함이다.
CSS #2 : 요소 꾸미기
loginForm.css 파일에 추가로 코드를 작성한다.
/* loginForm.css */
p {
    font-size : 30px;
    font-weight : bold;
}
input {
    width : 228px;
    height : 36px;
    margin-bottom : 10px;
    background-color : #fff9e9;
    border : 1px solid black;
    border-radius : 5px;
    padding-left : 15px;
    box-sizing : border-box;
}
.btnLogin {
    width : 150px;
    height : 40px;
    border-radius : 20px;
    background-color : #373f3c;
    border : 1px solid black;
    color : white;
    font-weight : bold;
    margin-top : 10px;
    margin-bottom : 20px;
}
요소들 간의 세로 간격은 margin-top, margin-bottom 속성을 사용해 조정했다.
CSS #3 : 열쇠 모양 아이콘 폰트 적용
아이콘 폰트를 사용하기 위해 CDN을 사용해 서버에 올려진 파일을 참조하려고 한다.
먼저 아래 CDNJS 사이트로 들어간다.
cdnjs - The #1 free and open source CDN built to make life easier for developers
Simple. Fast. Reliable. Content delivery at its finest. cdnjs is a free and open-source CDN service trusted by over 12.5% of all websites, serving over 200 billion requests each month, powered by Cloudflare. We make it faster and easier to load library fil
cdnjs.com
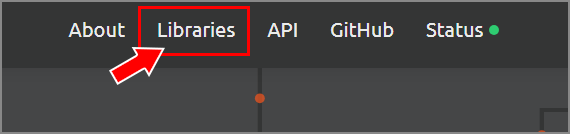
상단바에서 Libreries를 클릭한다.
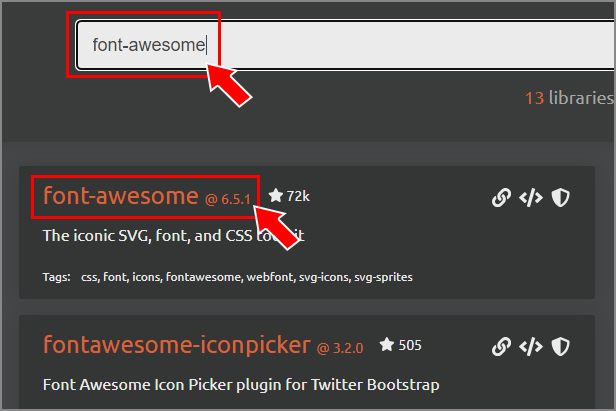
검색창에 font-awesome을 입력하고 font-awesome을 클릭
copy 버튼을 눌러서 cdn 주소를 복사한다.

loginForm.html 파일의 head 태그 안에 복사된 코드를 붙여 넣는다.
<head>
    <meta charset="UTF-8">
    <meta name="viewport" content="width=device-width, initial-scale=1.0">
    <title>LoginForm</title>
    <link rel="stylesheet" href="tistory_login.css">
    <link rel="stylesheet" href="https://cdnjs.cloudflare.com/ajax/libs/font-awesome/6.5.1/css/all.min.css"
        integrity="sha512-DTOQO9RWCH3ppGqcWaEA1BIZOC6xxalwEsw9c2QQeAIftl+Vegovlnee1c9QX4TctnWMn13TZye+giMm8e2LwA=="
        crossorigin="anonymous" referrerpolicy="no-referrer" />
</head>
이제 CDNJS에서 제공하는 파일을 참조할 수 있게 되었다.
이번엔 Font Awesome 사이트로 이동한다.
Font Awesome
The internet's icon library + toolkit. Used by millions of designers, devs, & content creators. Open-source. Always free. Always awesome.
fontawesome.com
상단바의 'Icons'를 클릭한다.

검색창에 key 검색 후 가장 처음에 보이는 아이콘 클릭
아이콘 위에 'PRO' 마크가 붙은 것은 유료로 사용할 수 있는 아이콘이다.

코드가 작성된 곳에 마우스를 갖다 대고 클릭하면 자동으로 코드가 복사된다.

loginForm.html 파일에서 넣고자 하는 위치에 코드를 붙여넣기 한다.
<p>Login <i class="fa-solid fa-key"></i></p>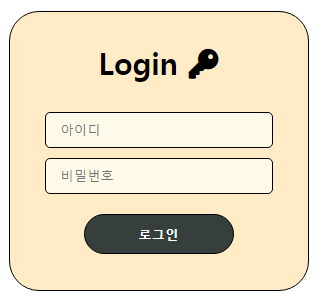
열쇠 모양 아이콘의 이름이 '아이콘 폰트'인 이유는 크기나 색상 등의 변경을 하기 위해서 font 관련 속성을 사용해야 하기 때문이다. font-size, color 속성 등으로 아이콘 폰트의 디자인을 수정할 수 있다.
/* loginForm.css */
i {
    font-size : 25px;
    color : rgb(116, 116, 116);
}
위에서 진행했던 전체적인 HTML / CSS 파일의 코드를 보면 아래와 같다.
▶ loginForm.html
<!DOCTYPE html>
<html lang="en">
<head>
    <meta charset="UTF-8">
    <meta name="viewport" content="width=device-width, initial-scale=1.0">
    <title>loginForm</title>
    <link rel="stylesheet" href="loginForm.css">
    <link rel="stylesheet" href="https://cdnjs.cloudflare.com/ajax/libs/font-awesome/6.5.1/css/all.min.css"
        integrity="sha512-DTOQO9RWCH3ppGqcWaEA1BIZOC6xxalwEsw9c2QQeAIftl+Vegovlnee1c9QX4TctnWMn13TZye+giMm8e2LwA=="
        crossorigin="anonymous" referrerpolicy="no-referrer" />
</head>
<body>
    <form class="container">
        <p>Login <i class="fa-solid fa-key"></i></p>
        <label for="username">
            <input type="text" id="username" name="username" placeholder="아이디">
        </label>
        <label for="password">
            <input type="password" name="password" placeholder="비밀번호">
        </label>
        <button type="submit" class="btnLogin">로그인</button>
    </form>
</body>
</html>
▶ loginForm.css
.container {
    width : 300px;
    height : 280px;
    border : 1px solid black;
    border-radius : 30px;
    background-color : rgb(255, 235, 197);
    padding : 0px 15px;
    text-align : center;
    box-sizing : border-box;
    margin : 100px auto;
}
i {
    font-size : 25px;
    color : rgb(116, 116, 116);
}
p {
    font-size : 30px;
    font-weight : bold;
}
input {
    width : 228px;
    height : 36px;
    margin-bottom : 10px;
    background-color : #fff9e9;
    border : 1px solid black;
    border-radius : 5px;
    padding-left : 15px;
    box-sizing : border-box;
}
.btnLogin {
    width : 150px;
    height : 40px;
    border-radius : 20px;
    background-color : #373f3c;
    border : 1px solid black;
    color : white;
    font-weight : bold;
    margin-top : 10px;
    margin-bottom : 20px;
}
다음으로는 자바스크립트를 통해 간단한 유효성 검사를 해보려고 한다.
간단한 로그인 폼 만들기 #2 : 유효성 검사
이전에 만들었던 폼에다 자바스크립트로 유효성 검사를 추가하려고 한다. ↓ 간단한 로그인 폼 만들기 #1 : 구조 만들기 아이디, 비밀번호 입력란과 로그인 버튼이 있는 간단한 로그인 폼을 만들
crescendo-code.tistory.com