4월 11일 (화) - [JTree, JDialog, JColorChooser, JFileChooser, JMenuBar]
- 직책별 프로그램 ( distinct 추가해보기 )
◆ JTree
- JTree의 값은 model 속성에서 주며, 탭 단위로 입력하면 된다.
- rootVisible 속성 : root 폴더를 감추거나 나오게 할 수 있다.
- showRootHandles : root 폴더를 접고 펼수 있게 수정한다.
Q. 트리 항목 클릭시 클릭 경로를 출력하는 프로그램

tree.addMouseListener(new MouseAdapter() {
	@Override
	public void mouseClicked(MouseEvent e) {
		System.out.println( "click : " + tree.getSelectionPath().toString() );
	}
});
- 트리를 건드리다 보면 소스 코드쪽에서 코드 깨짐이 발생할 수 있다. 이땐 수동적으로 수정해야 한다.
Q. 아래 트리를 makeTree라는 이름의 메서드로 재생성 후 호출하는 프로그램

tree.setModel( new DefaultTreeModel ( makeTree("root") ) );public DefaultMutableTreeNode makeTree ( String rootName ) {
DefaultMutableTreeNode root = new DefaultMutableTreeNode( rootName );
DefaultMutableTreeNode node1 = new DefaultMutableTreeNode( "colors" );
DefaultMutableTreeNode node2 = new DefaultMutableTreeNode( "sports" );
DefaultMutableTreeNode node3 = new DefaultMutableTreeNode( "food" );
DefaultMutableTreeNode leaf11 = new DefaultMutableTreeNode( "파랑색" );
DefaultMutableTreeNode leaf12 = new DefaultMutableTreeNode( "보라색" );
DefaultMutableTreeNode leaf13 = new DefaultMutableTreeNode( "빨강색" );
DefaultMutableTreeNode leaf14 = new DefaultMutableTreeNode( "노랑색" );
node1.add(leaf11);
node1.add(leaf12);
node1.add(leaf13);
node1.add(leaf14);
node2.add(new DefaultMutableTreeNode("basketball"));
node2.add(new DefaultMutableTreeNode("soccer"));
node2.add(new DefaultMutableTreeNode("football"));
node2.add(new DefaultMutableTreeNode("hockey"));
node3.add(new DefaultMutableTreeNode("hot dogs"));
node3.add(new DefaultMutableTreeNode("pizza"));
node3.add(new DefaultMutableTreeNode("ravioli"));
node3.add(new DefaultMutableTreeNode("bananas"));
root.add(node1);
root.add(node2);
root.add(node3);
return root;
}
- node1, node2 두 가지 생성방식 모두 적용된다.
◆ JDialog
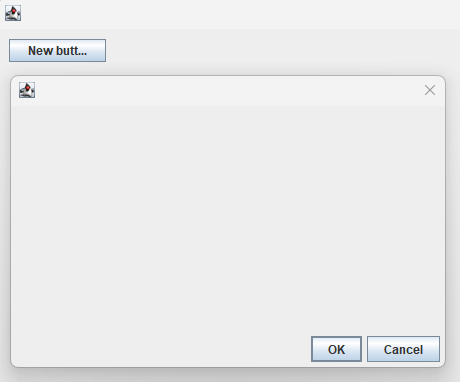
Q. 버튼을 누르면 새 창이 뜨는 프로그램
- contentPanel은 Absolute Layout으로 설정하고 작업
- JDialogEx01 (JDialog) , JDialogMainEx01 (JFrame) 두 개를 생성해서 작업
- JDialogEx01 의 메인메서드 부분은 주석처리 후 작업
- DISPOSE_ON_CLOSE 부여
btn.addMouseListener(new MouseAdapter() {
	@Override
	public void mouseClicked(MouseEvent e) {
		JDialogEx01 dialog = new JDialogEx01();
		dialog.setDefaultCloseOperation(JDialog.DISPOSE_ON_CLOSE);
		dialog.setVisible( true );
	}
});
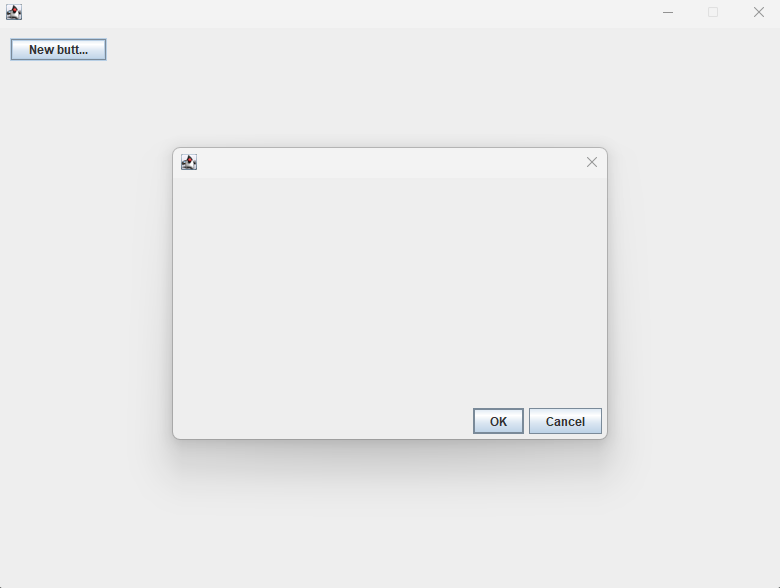
Q. 버튼을 누르면 Dialog 창을 최대 1개만 뜨게 설정하고, 그 창이 Frame의 중앙에 오게 설정
- Dimension과 Point를 이용한다. ( + Rectangle )
- modal : 서브창이 1개만 팝업되게 설정할 수 있다.
btn.addMouseListener(new MouseAdapter() {
	@Override
	public void mouseClicked(MouseEvent e) {
		JDialogEx01 dialog = new JDialogEx01();
		dialog.setDefaultCloseOperation(JDialog.DISPOSE_ON_CLOSE);

		dialog.setModal(true);

		/*
		Dimension d = JDialogMainEx01.this.getSize();
		System.out.println( d.toString() );

		Point p = JDialogMainEx01.this.getLocation();
		System.out.println( p.toString() );
		*/

		Rectangle r = JDialogMainEx01.this.getBounds();
		System.out.println( r.toString() );

		int fx = (int)r.getX();
		int fy = (int)r.getY();
		int fwidth = (int)r.getWidth();
		int fheight = (int)r.getHeight();

		int dwidth = 450;
		int dheight = 300;

		dialog.setBounds( fwidth/2 - dwidth/2 + fx, fheight/2 - dheight/2 + fy, dwidth, dheight );

		dialog.setVisible( true );
	}
});
Q. Dialog의 OK, CLOSE 버튼을 누르면 Dialog 창이 닫히는 프로그램
- 각 버튼 이벤트 핸들러 → actionPerformed 활용
okButton.addActionListener(new ActionListener() {
	public void actionPerformed(ActionEvent e) {
		JDialogEx01.this.dispose();
	}
});

cancelButton.addActionListener(new ActionListener() {
	public void actionPerformed(ActionEvent e) {
		JDialogEx01.this.dispose();
	}
});
JDialogEx02 (JDialog) , JDialogMainEx02 (JFrame) 생성
JDialogEx02의 setDefaultCloseOperation(JDialog.DISPOSE_ON_CLOSE);만
생성자 안으로 옮기고 main 메서드 삭제 후 작업
- Modal이 true면 1, 2만 출력된다.
- setVisible 기능이 발현되는 순간 JFrame의 제어권이 밀려난다.
		btn.addMouseListener(new MouseAdapter() {
			@Override
			public void mouseClicked(MouseEvent e) {
				JDialogEx02 dialog = new JDialogEx02();
				System.out.println( "1" );

				dialog.setModal(true);
				System.out.println( "2" );

				dialog.setVisible(true);
				System.out.println( "3" );
			}
		});
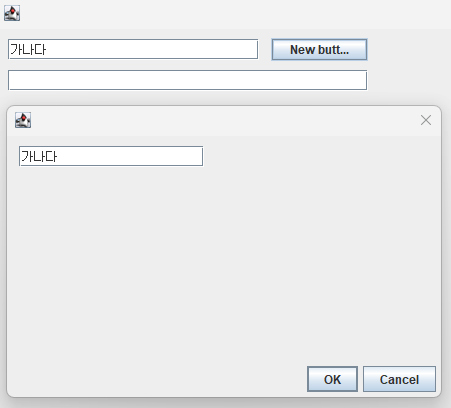
Q. JFrame 의 텍스트필드에 입력한 글자를 JDialog의 텍스트필드에 복사하는 프로그램
- JDialogMainEx02 클릭 이벤트 부분
btn.addMouseListener(new MouseAdapter() {
	@Override
	public void mouseClicked(MouseEvent e) {

		JDialogEx02 dialog = new JDialogEx02( textField1.getText() );

		dialog.setModal(true);
		dialog.setVisible(true);

		// JFrame → JDialog : 생성자, setter
		// JDialog → JFrame : 멤버필드, getter

	}
});
- JDialogEx02 생성자 부분
	public JDialogEx02(String data) {
		this();
		this.data = data;
		this.textField.setText( data );

	}
Q. 위의 예제에서 JDialog창의 OK / CANCEL을 누르면 JFrame의 두 번째 텍스트박스로 내용 복제
- JDialogMainEx02 클릭 이벤트 부분
btn.addMouseListener(new MouseAdapter() {
	@Override
	public void mouseClicked(MouseEvent e) {

		JDialogEx02 dialog = new JDialogEx02( textField1.getText() );
		dialog.setModal(true);
		dialog.setVisible(true);

		String data = dialog.getData();
		System.out.println( "결과 : " + data );

		textField2.setText( data );

		// JFrame → JDialog : 생성자, setter
		// JDialog → JFrame : 멤버필드, getter

	}
});
- JDialogEx02 생성자 부분은 기존과 같다.
- OK / CANCEL 버튼 이벤트 부분
cancelButton.addActionListener(new ActionListener() {
	public void actionPerformed(ActionEvent e) {
		JDialogEx02.this.setData( textField.getText() );
		JDialogEx02.this.dispose();
	}
});
예제 1. JFrame에 시작단과 끝단을 입력하고 버튼을 누르면 JDialog에 구구단이 출력되는 프로그램
- 시간 남으면 textArea대신 table로도 구현

- JDialogGuguanMain 버튼 이벤트 부분
btn.addMouseListener(new MouseAdapter() {
	@Override
	public void mouseClicked(MouseEvent e) {

		JDialogGugudan dialog = new JDialogGugudan( textField1.getText(), textField2.getText() );

		dialog.setModal(true);
		dialog.setVisible(true);
	}
});
- JDialogGugudan 생성자 부분
public JDialogGugudan( String startDan, String endDan) {

	this();
	int start = Integer.parseInt(startDan);
	int end = Integer.parseInt(endDan);

	for ( int i=start; i<=end; i++ ) {
		for( int j=1; j<=9; j++ ) {
			textArea.append( i + "x" + j + "=" + (i*j) + "  ");
		}
		textArea.append( "\n" );
	}
}
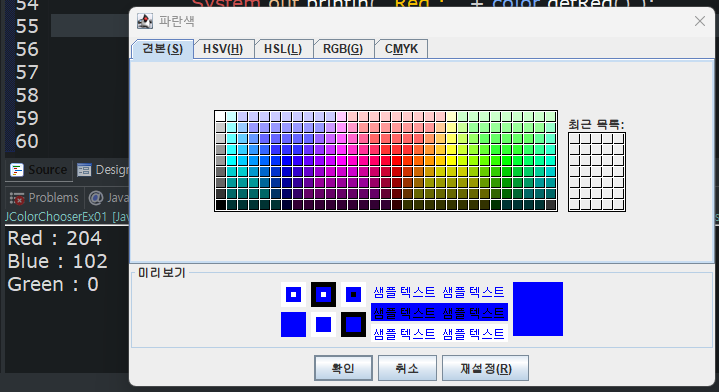
◆ JColorChooser
- x를 누르면 null이 리턴된다.
Q. ColorChooser에서 색상을 선택하면 RGB 값을 출력하는 프로그램
btn1.addMouseListener(new MouseAdapter() {
	@Override
	public void mouseClicked(MouseEvent e) {
		Color color = JColorChooser.showDialog( JColorChooserEx01.this, "파란색", Color.BLUE);
		if( color != null ) {
			System.out.println( "Red : " + color.getRed() );
			System.out.println( "Blue : " + color.getBlue() );
			System.out.println( "Green : " + color.getGreen() );
		} else {
			System.out.println( "취소 선택" );
		}
	}
});
◆ JFileChooser
- Open의 디폴트는 '내 문서'이다.
Q. 디폴트 경로를 c 드라이브로 설정
		btn.addMouseListener(new MouseAdapter() {
			@Override
			public void mouseClicked(MouseEvent e) {
				// JFileChooser fileChooser = new JFileChooser();
				JFileChooser fileChooser = new JFileChooser( "c:\\" );
				fileChooser.showOpenDialog( JFileChooserEx01.this );
			}
		});
Q. 버튼을 누르면 아래 조건을 만족하는 프로그램 제작
1. 파일의 선택 및 종료에 따라 확인 / 취소가 출력
2. 파일을 선택해서 누르면 파일 이름과 파일의 절대경로 출력
btn.addMouseListener(new MouseAdapter() {
	@Override
	public void mouseClicked(MouseEvent e) {
		// JFileChooser fileChooser = new JFileChooser();
		JFileChooser fileChooser = new JFileChooser( "c:\\" );

		int result = fileChooser.showOpenDialog( JFileChooserEx01.this );
		if ( result == JFileChooser.APPROVE_OPTION ) {
			System.out.println( "확인" );

			File file = fileChooser.getSelectedFile();
			System.out.println( file.getName() ); // 파일 이름
			System.out.println( file.getAbsolutePath() ); // 파일 절대경로

		} else if ( result == JFileChooser.CANCEL_OPTION ) {
			System.out.println( "취소" );
		}
	}
});
Q. 파일 열기 버튼을 추가하고 파일 뷰어 만들기
btn.addMouseListener(new MouseAdapter() {
	@Override
	public void mouseClicked(MouseEvent e) {

		// 객체 생성
		// JFileChooser fileChooser = new JFileChooser();

		// 객체 생성 및 디폴트 경로 지정
		JFileChooser fileChooser = new JFileChooser( "c:\\" );

		// file 확장자 필터링
		FileNameExtensionFilter filter = new FileNameExtensionFilter( "java 소스", "java", "txt" );
		fileChooser.setFileFilter( filter );

		int result = fileChooser.showOpenDialog( JFileChooserEx01.this );
		if ( result == JFileChooser.APPROVE_OPTION ) {
			System.out.println( "확인" );

			File file = fileChooser.getSelectedFile();

			// 파일 이름
			// System.out.println( file.getName() );

			// 파일 절대경로
			// System.out.println( file.getAbsolutePath() );

			// list - File
			// IO - Stream

			textArea.setText( "" );

			BufferedReader br = null;
			try {
				br = new BufferedReader ( new FileReader (file) );
				String line = null;
				while( ( line = br.readLine()) != null ) {
					textArea.append( line + System.lineSeparator() );
				}
			} catch (FileNotFoundException e1) {
				// TODO Auto-generated catch block
				e1.printStackTrace();
			} catch (IOException e1) {
				// TODO Auto-generated catch block
				e1.printStackTrace();
			} finally {
				if ( br != null ) try { br.close(); } catch( IOException e1 ) {}
			}

		} else if ( result == JFileChooser.CANCEL_OPTION ) {
			System.out.println( "취소" );
		}
	}
});
Q. 파일 저장 버튼을 추가하고 파일 저장 만들기

btn2.addMouseListener(new MouseAdapter() {
	@Override
	public void mouseClicked(MouseEvent e) {
		JFileChooser fileChooser = new JFileChooser( "c:\\" );
		int result = fileChooser.showSaveDialog( JFileChooserEx01.this );

		if( result == JFileChooser.APPROVE_OPTION ) {
			System.out.println( "확인" + fileChooser.getSelectedFile().getName() );
			System.out.println( "확인" + fileChooser.getSelectedFile().getAbsolutePath() );
		} else {
			System.out.println( "취소" );
		}

		BufferedWriter bw = null;
		try {
			bw = new BufferedWriter ( new FileWriter ( fileChooser.getSelectedFile().getAbsolutePath()) );
			bw.write( textArea.getText() );
			JOptionPane.showMessageDialog( JFileChooserEx01.this, "내용 저장", "저장", JOptionPane.INFORMATION_MESSAGE);

		} catch (FileNotFoundException e1) {
			// TODO Auto-generated catch block
			e1.printStackTrace();
		} catch (IOException e1) {
			// TODO Auto-generated catch block
			e1.printStackTrace();
		} finally {
			if ( bw != null ) try { bw.close(); } catch( IOException e1 ) {}
		}
	}
});
예제 2. 파일을 불러와서 파일을 보여주는 이미지 뷰어 만들기
- 라벨 + 스크롤 이용
		btn.addMouseListener(new MouseAdapter() {
			@Override
			public void mouseClicked(MouseEvent e) {

				JFileChooser fileChooser = new JFileChooser( "c:\\" );

				FileNameExtensionFilter filter = new FileNameExtensionFilter( "이미지", "png", "jpg" );
				fileChooser.setFileFilter( filter );

				lbl.setIcon(new ImageIcon("C:\\다운로드\\Jellyfish.jpg"));

				int result = fileChooser.showOpenDialog( ImageViewerEx01.this );
				if ( result == JFileChooser.APPROVE_OPTION ) {
					System.out.println( "확인" );

					File file = fileChooser.getSelectedFile();
					lbl.setIcon(new ImageIcon( file.getAbsolutePath() ));
					BufferedReader br = null;
					try {
						br = new BufferedReader ( new FileReader (file) );
						String line = null;
						while( ( line = br.readLine()) != null ) {
						}
					} catch (FileNotFoundException e1) {
						// TODO Auto-generated catch block
						e1.printStackTrace();
					} catch (IOException e1) {
						// TODO Auto-generated catch block
						e1.printStackTrace();
					} finally {
						if ( br != null ) try { br.close(); } catch( IOException e1 ) {}
					}

				} else if ( result == JFileChooser.CANCEL_OPTION ) {
					System.out.println( "취소" );
				}

			}
		});
◆ JMenuBar
1. 프레임 클릭 후 JMenuBar로 메뉴바 생성
2. JMenu로 메뉴 목록들을 생성
3. JMenuItem으로 각 메뉴의 하위 메뉴를 생성
4. JCheckBoxMenuItem, JRadioButtonMenuItem으로 체크박스, 라디오버튼도 메뉴에 생성할 수 있다.
- 이때는 selected 옵션으로 기본 체크값 설정도 가능하다.
Q. 메뉴 구분선

mnNewMenu.addSeparator();
- 각 메뉴마다 event handler → action → actionPerformed 로 이벤트를 부여할 수 있다.
예제 3. 우편번호 검색기 프로그램
콤보박스로 시/도 선택하면 그에 해당되는 콤보박스 구/군, 구/군 선택하면 그에 해당되는 콤보박스 동을 선택하면서
해당하는 남은 데이터를 출력하는 프로그램
출력 공간은 1. JtextArea, 2. JTable 로 만들어 볼 것
- 중복 제거에 신경 쓸 것
- 쿼리문은 총 4개가 필요