5월 16일 (화) - [ JQuery 구문 / 시작단 ~ 끝단 구구단 / 우편번호 검색기 ]
이전 수업 개념
JQuery
- 자바스크립트로 만든 라이브러리
- 1순위로는 JQuery 사이트 (변화가 빠르므로), 2순위로는 책으로 학습하는것이 가장 좋다.
- https://www.w3schools.com 에서도 JQuery 문법을 학습할 수 있다.
▶ DOM에 관련된 내용 처리
1. selector → CSS
2. 처리용 메서드가 존재한다.
- 배열
- .... (오늘 학습)
JQuery 예제 - Filter
- HtmlCollection : 배열과 비슷한 형태
- 주석 처리된 부분도 주석 해제 후 실행해 볼 것
▶ jquery17.jsp 파일 생성 및 코드 작성
<%@ page language="java" contentType="text/html; charset=UTF-8"
    pageEncoding="UTF-8"%>
<!DOCTYPE html>
<html>
<head>
<meta charset="UTF-8">
<title>Insert title here</title>
<script src="https://ajax.googleapis.com/ajax/libs/jquery/3.6.4/jquery.min.js"></script>
<script type="text/javascript">
	$( document ).ready( function() {
		// $( 'h1:even' ).css( 'color', 'red' );
		// $( 'h1' ).filter( ':even' ).css({
			// color: 'blue',
			// backgroundColor: 'yellow'
		// });

		// const h1 = $( 'h1' ); // htmlcollection
		// console.log( h1 );
		// h1.filter( ':even' ).css( 'color', 'blue' );
		// h1.filter( ':odd' ).css( 'color', 'green' );

		// $( 'h1:nth-child(2n+1)' ).css( 'color', 'yellow' );
		$( 'h1' ).filter( ':nth-child(2n+1)' ).css( 'color', 'yellow' );
	});
</script>
</head>
<body>
<h1>Header-1</h1>
<h1>Header-2</h1>
<h1>Header-3</h1>
<h1>Header-4</h1>
<h1>Header-5</h1>
</body>
</html>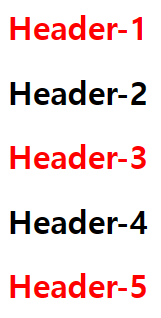
JQuery 예제 - Filter (2)
- 필터의 내용을 익명함수를 통해 생성할 수 있다.
- for문 효과(개별 지정)를 통한 필터의 조건문
- filter는 검색 및 리턴작업을 할 때 많이 쓰인다.
▶ jquery18.jsp 파일 생성 및 코드 작성
<%@ page language="java" contentType="text/html; charset=UTF-8"
    pageEncoding="UTF-8"%>
<!DOCTYPE html>
<html>
<head>
<meta charset="UTF-8">
<title>Insert title here</title>
<script src="https://ajax.googleapis.com/ajax/libs/jquery/3.6.4/jquery.min.js"></script>
<script type="text/javascript">
	$( document ).ready( function() {
		$( 'h1' ).filter( function( index ) {
			// true / false
			return index % 2 == 0;
		}).css( 'color', 'blue' );
	});
</script>
</head>
<body>
<h1>Header-1</h1>
<h1>Header-2</h1>
<h1>Header-3</h1>
<h1>Header-4</h1>
<h1>Header-5</h1>
</body>
</html>
JQuery 예제 - Filter (3)
- end() : 이전의 filter 효과를 취소한다. (연속적인 필터 적용에 효과적이다.)
▶ jquery19.jsp 파일 생성 및 코드 작성
<%@ page language="java" contentType="text/html; charset=UTF-8"
    pageEncoding="UTF-8"%>
<!DOCTYPE html>
<html>
<head>
<meta charset="UTF-8">
<title>Insert title here</title>
<script src="https://ajax.googleapis.com/ajax/libs/jquery/3.6.4/jquery.min.js"></script>
<script type="text/javascript">
	$( document ).ready( function() {
		// $( 'h1' ).css( 'background-color', 'orange' );
		// $( 'h1' ).filter( ':even' ).css( 'color', 'red' );
		// $( 'h1' ).filter( ':odd' ).css( 'color', 'white' );

		$( 'h1' ).css( 'background-color', 'orange' )
			.filter( ':even' ).css( 'color', 'red' )
			.end()
			.filter( ':odd' ).css( 'color', 'white' );
	});
</script>
</head>
<body>
<h1>Header-1</h1>
<h1>Header-2</h1>
<h1>Header-3</h1>
<h1>Header-4</h1>
<h1>Header-5</h1>
</body>
</html>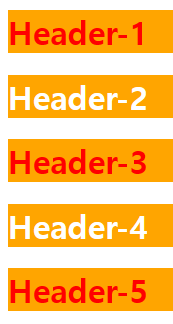
JQuery 예제 - add
- add() : 효과를 적용할 태그 및 속성을 추가한다.
- add() 이후의 효과가 동시 적용됨에 주의한다.
▶ jquery20.jsp 파일 생성 및 코드 작성
<%@ page language="java" contentType="text/html; charset=UTF-8"
    pageEncoding="UTF-8"%>
<!DOCTYPE html>
<html>
<head>
<meta charset="UTF-8">
<title>Insert title here</title>
<script src="https://ajax.googleapis.com/ajax/libs/jquery/3.6.4/jquery.min.js"></script>
<script type="text/javascript">
	$( document ).ready( function() {
		// $( 'h1' ).css( 'background-color', 'orange' );
		// $( 'h1, h2' ).css( 'color', 'red' );

		$( 'h1' ).css( 'background-color', 'orange' ).add( 'h2' ).css( 'color', 'red' );
	});
</script>
</head>
<body>
<h1>Header-1</h1>
<h2>Header-2</h2>
<h1>Header-3</h1>
<h2>Header-4</h2>
<h1>Header-5</h1>
</body>
</html>
JQuery 예제 - find (1) (★)
- find() : 해당하는 태그 및 속성을 검색한다.
▶ jquery21.jsp 파일 생성 및 코드 작성
<%@ page language="java" contentType="text/html; charset=UTF-8"
    pageEncoding="UTF-8"%>
<!DOCTYPE html>
<html>
<head>
<meta charset="UTF-8">
<title>Insert title here</title>
<script src="https://ajax.googleapis.com/ajax/libs/jquery/3.6.4/jquery.min.js"></script>
<script type="text/javascript">
	$( document ).ready( function() {
		// console.log( $( document ).find( 'h2' ) );
		// $( document ).find( 'h2' ).each( function( index, item ) {
		$( document ).find( '.c' ).each( function( index, item ) {
			console.log( index, ':', this.innerHTML );
		});
	});
</script>
</head>
<body>
<h2 class="c">Header-1</h2>
<h2>Header-2</h2>
<h2 class="c">Header-3</h2>
<h2>Header-4</h2>
<h2 class="c">Header-5</h2>
</body>
</html>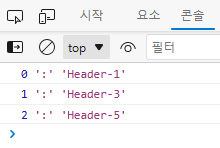
JQuery 예제 - find (2) (★)
- XML 데이터에서 find를 활용하는 예제
▶ jquery22.jsp 파일 생성 및 코드 작성
<%@ page language="java" contentType="text/html; charset=UTF-8"
    pageEncoding="UTF-8"%>
<!DOCTYPE html>
<html>
<head>
<meta charset="UTF-8">
<title>Insert title here</title>
<script src="https://ajax.googleapis.com/ajax/libs/jquery/3.6.4/jquery.min.js"></script>
<script type="text/javascript">
	const xml = `<friends>
		<friend>
			<name>tester1</name>
			<language>Javascript</language>
		</friend>
		<friend>
			<name>tester2</name>
			<language>Java</language>
		</friend>
		<friend>
			<name>tester3</name>
			<language>Python</language>
		</friend>
	</friends>
	`;

	$( document ).ready( function() {
		console.log( typeof xml );

		const xmlDoc = $.parseXML( xml );
		console.log( typeof xmlDoc );

		$( xmlDoc ).find( 'friend' ).each( function( index, item ) {
			console.log( index );
			console.log( item.innerHTML );
			console.log( $( item ).find( 'name' )[0].innerHTML );
			console.log( $( item ).find( 'language' )[0].innerHTML );
		});
	});

</script>
</head>
<body>

</body>
</html>
JQuery 예제 - is
- is() : () 안의 태그 및 속성이 존재하는지 존재 여부를 확인할 때 사용
▶ jquery23.jsp 파일 생성 및 코드 작성
<%@ page language="java" contentType="text/html; charset=UTF-8"
    pageEncoding="UTF-8"%>
<!DOCTYPE html>
<html>
<head>
<meta charset="UTF-8">
<title>Insert title here</title>
<script src="https://ajax.googleapis.com/ajax/libs/jquery/3.6.4/jquery.min.js"></script>
<script type="text/javascript">
	$( document ).ready( function() {
		$( 'h2' ).each( function() {
			// is
			if( $( this ).is( '.c' ) ) {
				$( this ).css( 'color', 'orange' );
			}
		});
	});
</script>
</head>
<body>
<h2 class="c">Header-1</h2>
<h2>Header-2</h2>
<h2 class="c">Header-3</h2>
<h2>Header-4</h2>
<h2 class="c">Header-5</h2>
</body>
</html>
JQuery 예제 - json / 객체
- 동적 프로퍼티의 추가가 가능하다.
- 객체에 대한 확장이 가능하다.
▶ jquery24.jsp 파일 생성 및 코드 작성
<%@ page language="java" contentType="text/html; charset=UTF-8"
    pageEncoding="UTF-8"%>
<!DOCTYPE html>
<html>
<head>
<meta charset="UTF-8">
<title>Insert title here</title>
<script src="https://ajax.googleapis.com/ajax/libs/jquery/3.6.4/jquery.min.js"></script>
<script type="text/javascript">
	$( document ).ready( function() {
		// json
		let object = { name : '홍길동' };
		console.log( object );

		// 동적 프로퍼티 추가가 가능
		object.region1 = '서울시 종로구';
		object.part1 = '리더';
		console.log( object );

		$.extend( object,
				{ region2 : '서울시 강남구', part2 : '베이스' },
				{ region3 : '서울시 서초구', part3 : '세컨드' }
		);

		console.log( object );
	});
</script>
</head>
<body>

</body>
</html>
JQuery 예제 - noConflict
- $를 사용하지 않을 경우 jQuery로 대체할 수 있다.
- jQuery를 다른 변수로 선언 및 할당해서 사용할 수 있다.
▶ jquery25.jsp 파일 생성 및 코드 작성
<%@ page language="java" contentType="text/html; charset=UTF-8"
    pageEncoding="UTF-8"%>
<!DOCTYPE html>
<html>
<head>
<meta charset="UTF-8">
<title>Insert title here</title>
<script src="https://ajax.googleapis.com/ajax/libs/jquery/3.6.4/jquery.min.js"></script>
<script type="text/javascript">

	// $를 사용하지 않겠다는 의미
	$.noConflict();

	const J = jQuery;

	// $( document ).ready( function() {
	J( document ).ready( function() {

		let object = { name : '홍길동' };

		J.extend( object,
				{ region2 : '서울시 강남구', part2 : '베이스' },
				{ region3 : '서울시 서초구', part3 : '세컨드' }
		);

		console.log( object );
	});
</script>
</head>
<body>

</body>
</html>
JQuery 예제 - html / text (1) (★)
- jQuery 구문을 이용한 HTML 태그나 내용을 추출 및 수정
▶ jquery26.jsp 파일 생성 및 코드 작성
<%@ page language="java" contentType="text/html; charset=UTF-8"
    pageEncoding="UTF-8"%>
<!DOCTYPE html>
<html>
<head>
<meta charset="UTF-8">
<title>Insert title here</title>
<script src="https://ajax.googleapis.com/ajax/libs/jquery/3.6.4/jquery.min.js"></script>
<script type="text/javascript">
	$( document ).ready( function() {
		// innerHTML → html();
		// textContent → text();
		document.getElementById( 'btn1' ).onclick = function() {
			// Javascript 방식
			const html = document.getElementById( 'result' );
			console.log( html.innerHTML );
			console.log( html.textContent );

			// jQuery 방식
			console.log( $( '#result' ).html() );
			console.log( $( '#result' ).text() );
		};

		document.getElementById( 'btn2' ).onclick = function() {
			// Javascript 방식
			const html = document.getElementById( 'result' );
			// html.innerHTML = '<i>새로운 결과</i>';
			// html.textContent = '<i>새로운 결과</i>';

			// jQuery 방식
			// $( '#result' ).html( '<i>새로운 결과</i>' );
			$( '#result' ).text( '<i>새로운 결과</i>' );
		};

	});
</script>
</head>
<body>

<button id="btn1">내용 확인</button>
<button id="btn2">내용 수정</button>
<br /><hr /><br />
<div id="result"><b>출력내용</b></div>

</body>
</html>
- 주석을 해제하면서 실험해볼 것
JQuery 예제 - html / text (2)
- 집합적으로 처리하기
▶ jquery27.jsp 파일 생성 및 코드 작성
<%@ page language="java" contentType="text/html; charset=UTF-8"
    pageEncoding="UTF-8"%>
<!DOCTYPE html>
<html>
<head>
<meta charset="UTF-8">
<title>Insert title here</title>
<script src="https://ajax.googleapis.com/ajax/libs/jquery/3.6.4/jquery.min.js"></script>
<script type="text/javascript">
	$( document ).ready( function() {
		document.getElementById( 'btn' ).onclick = function() {
			// 집합적 적용
			// $( 'div' ).html( '<i>새로운 결과</i>' );

			$( 'div' ).html( function( index ) {
				return '<i>새로운 결과 ' + index + '</i>'
			});
		};
	});
</script>
</head>
<body>

<button id="btn">내용 확인</button>
<br /><hr /><br />
<div><b>출력내용 1</b></div>
<div><b>출력내용 2</b></div>
<div><b>출력내용 3</b></div>

</body>
</html>
jQuery를 이용하여 시작단, 끝단을 입력하면 출력되는 구구단 만들기
- 최대한 jQuery 구문을 사용해서 완성해보기
▶ gugudan.jsp 파일 생성 및 코드 작성
<%@ page language="java" contentType="text/html; charset=UTF-8"
    pageEncoding="UTF-8"%>
<!DOCTYPE html>
<html>
<head>
<meta charset="UTF-8">
<title>Insert title here</title>
<script src="https://ajax.googleapis.com/ajax/libs/jquery/3.6.4/jquery.min.js"></script>
<script type="text/javascript">
	$( document ).ready( function() {
		document.getElementById( 'btn' ).onclick = function() {

			const startDan = $( '#startdan' ).val();
			const endDan = $( '#enddan' ).val();

			const iStartDan = parseInt( startDan );
			const iEndDan = parseInt( endDan );

			let html = '<table border="1" width="800" style="text-align:center">';
			for( let i=iStartDan; i<=iEndDan; i++ ) {
				html += '<tr>';
				for( let j=1; j<=9; j++ ) {
					html += '<td>' + i + 'X' + j + '=' + (i*j) + '</td>';
				}
				html += '</tr>';
			}
			html += '</table>';
			$( '#result' ).html( html );
		};
	});
</script>
</head>
<body>

<!-- 최대한 jQuery를 이용해 표현 -->
시작단 <input type="text" id="startdan" />
~ 끝단 <input type="text" id="enddan" />
<button id="btn">구구단 출력</button>
<br /><hr /><br />
<div id="result"></div>

</body>
</html>
JQuery 예제 - html 태그 내용 추가
- 특정 위치에 태그를 추가할 수 있다.
- 구문에 따라 추가하는 위치가 달라진다. ( appendTo / prependTo / insertAfter / insertBefore )
▶ jquery28.jsp 파일 생성 및 코드 작성
<%@ page language="java" contentType="text/html; charset=UTF-8"
    pageEncoding="UTF-8"%>
<!DOCTYPE html>
<html>
<head>
<meta charset="UTF-8">
<title>Insert title here</title>
<script src="https://ajax.googleapis.com/ajax/libs/jquery/3.6.4/jquery.min.js"></script>
<script type="text/javascript">
	$( document ).ready( function() {
		document.getElementById( 'btn' ).onclick = function() {
			// $( '태그' ) - selector
			// $( 'html 내용' ) - 생성

			// appendTo / prependTo / insertAfter / insertBefore
			// $( '<i>Hello jQuery</i>' ).prependTo( '#result' );
			$( '<i></i>' ).html( 'Hello jQuery' ).prependTo( '#result' );
		};
	});
</script>
</head>
<body>

<button id="btn">내용 추가</button>
<br /><hr /><br />
<div id="result"><b>출력내용 1</b></div>

</body>
</html>
JQuery 예제 - html 태그 내용 삭제
- 내용을 삭제하려면 html의 공백을 이용하거나, empty()를 이용한다.
- 태그 자체를 삭제하려면 remove()를 이용한다.
▶ jquery29.jsp 파일 생성 및 코드 작성
<%@ page language="java" contentType="text/html; charset=UTF-8"
    pageEncoding="UTF-8"%>
<!DOCTYPE html>
<html>
<head>
<meta charset="UTF-8">
<title>Insert title here</title>
<script src="https://ajax.googleapis.com/ajax/libs/jquery/3.6.4/jquery.min.js"></script>
<script type="text/javascript">
	$( document ).ready( function() {

		// 내용 삭제
		document.getElementById( 'btn1' ).onclick = function() {
			$( '#d' ).html( '' );
		};

		document.getElementById( 'btn2' ).onclick = function() {
			$( '#d' ).empty();
		};

		// 태그 삭제
		document.getElementById( 'btn3' ).onclick = function() {
			$( '#d' ).remove();
		};

		document.getElementById( 'btn4' ).onclick = function() {
			$( 'p' ).first().remove();
		};

	});
</script>
</head>
<body>

<button id="btn1">내용 삭제</button>
<button id="btn2">내용 삭제</button>
<button id="btn3">내용 삭제</button>
<button id="btn4">내용 삭제</button>
<br /><hr /><br />
<div id="d">
	<p>내용 1<p>
	<p>내용 2<p>
</div>

</body>
</html>
JQuery 예제 - 속성 내용 추출 / 수정 / 제거
- attr : 속성의 내용을 가져온다.
- removeAttr : 속성을 제거한다.
- 개발자에 의해 만들어진 임의의 속성도 접근이 가능하다. (버튼 data 속성)
- 필요 자료 : image1 폴더 (이미지 파일 4장)
▶ jquery30.jsp 파일 생성 및 코드 작성
<%@ page language="java" contentType="text/html; charset=UTF-8"
    pageEncoding="UTF-8"%>
<!DOCTYPE html>
<html>
<head>
<meta charset="UTF-8">
<title>Insert title here</title>
<script src="https://ajax.googleapis.com/ajax/libs/jquery/3.6.4/jquery.min.js"></script>
<script type="text/javascript">
	$( document ).ready( function() {

		document.getElementById( 'btn1' ).onclick = function() {
			// 1개
			// console.log( $( 'img' ).attr( 'src' ) );

			// $( 'img' ).each( function( index, item ) {
				// console.log( $( item ).attr( 'src' ) );
			// });

			$( 'img' ).attr( 'src', function( index, item ) {
				console.log( item );
			});
		};

		document.getElementById( 'btn2' ).onclick = function() {

			// $( 'img' ).attr( 'width', 100 );
			// $( 'img' ).attr( 'width', function( index ) {
				// return ( index + 1 ) * 50;
			// });

			// 다중 속성 부여
			$( 'img' ).attr( {
				width : function( index ) {
					return ( index + 1 ) * 100;
				},
				height : 200
			});
		};

		document.getElementById( 'btn3' ).onclick = function() {
			$( 'img' ).removeAttr( 'height' );
		};

	});

</script>
</head>
<body>

<button id="btn1">속성 내용</button>
<button id="btn2">속성 수정</button>
<button id="btn3">속성 제거</button>
<br /><hr /><br />
<img src="./image1/Chrysanthemum.jpg" width="150" data="1"/>
<img src="./image1/Desert.jpg" width="150" data="2"/>
<img src="./image1/Hydrangeas.jpg" width="150" data="3"/>
<img src="./image1/Jellyfish.jpg" width="150" data="4"/>

</body>
</html>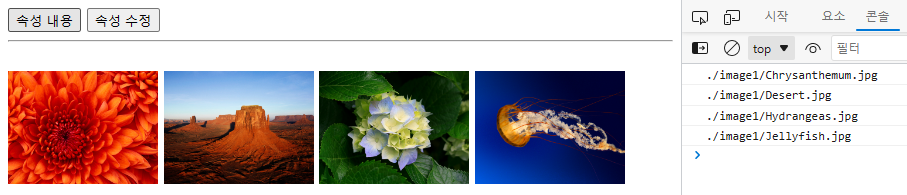


JQuery 예제 - 입력 박스의 데이터 추출 및 수정
▶ jquery31.jsp 파일 생성 및 코드 작성
<%@ page language="java" contentType="text/html; charset=UTF-8"
    pageEncoding="UTF-8"%>
<!DOCTYPE html>
<html>
<head>
<meta charset="UTF-8">
<title>Insert title here</title>
<script src="https://ajax.googleapis.com/ajax/libs/jquery/3.6.4/jquery.min.js"></script>
<script type="text/javascript">
	$( document ).ready( function() {
		document.getElementById( 'btn1' ).onclick = function() {
			// 기본 방식
			// console.log( document.frm.data.value );

			// JQuery 방식
			console.log( $( '#data' ).val() );
		};

		document.getElementById( 'btn2' ).onclick = function() {
			$( '#data' ).val( '새로운 데이터' );
		};
	});

</script>
</head>
<body>

<button id="btn1">내용</button>
<button id="btn2">내용</button>
<br /><hr /><br />
<form name="frm">
데이터 <input type="text" name="data" id="data" />
</form>

</body>
</html>
JQuery 예제 - 체크박스 / 셀렉트박스 에서 선택된 데이터 출력
▶ jquery32.jsp 파일 생성 및 코드 작성
<%@ page language="java" contentType="text/html; charset=UTF-8"
    pageEncoding="UTF-8"%>
<!DOCTYPE html>
<html>
<head>
<meta charset="UTF-8">
<title>Insert title here</title>
<script src="https://ajax.googleapis.com/ajax/libs/jquery/3.6.4/jquery.min.js"></script>
<script type="text/javascript">
	$( document ).ready( function() {
		document.getElementById( 'btn1' ).onclick = function() {
			$( 'input:checkbox:checked' ).each( function() {
				console.log( $( this ).val() );
			});
		};
	});

</script>
</head>
<body>

<button id="btn1">내용</button>
<br /><hr /><br />
<form name="frm">
	<input type="checkbox" id="ch1" name="ch" value="사과">사과<br />
	<input type="checkbox" id="ch2" name="ch" value="수박">수박<br />
	<input type="checkbox" id="ch3" name="ch" value="딸기">딸기<br />
	<input type="checkbox" id="ch4" name="ch" value="참외">참외<br />
</form>

</body>
</html>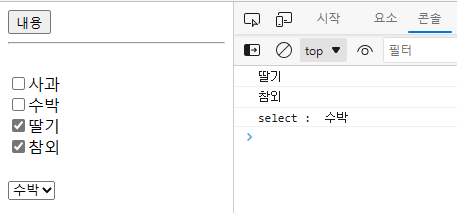
JQuery 예제 - CSS의 속성 추출 / 수정
▶ jquery33.jsp 파일 생성 및 코드 작성
<%@ page language="java" contentType="text/html; charset=UTF-8"
    pageEncoding="UTF-8"%>
<!DOCTYPE html>
<html>
<head>
<meta charset="UTF-8">
<title>Insert title here</title>
<style type="text/css">
	.c1 { color : red; }
	.c2 { color : pink; }
	.c3 { color : orange; }
</style>
<script src="https://ajax.googleapis.com/ajax/libs/jquery/3.6.4/jquery.min.js"></script>
<script type="text/javascript">
	$( document ).ready( function() {
		document.getElementById( 'btn1' ).onclick = function() {
			// console.log( $( 'h2' ).css( 'color' ) );
			$( 'h2' ).css( 'color', function( index, item ) {
				console.log( item );
			});
		};

		document.getElementById( 'btn2' ).onclick = function() {
			// $( 'h2' ).css( 'color', 'cyan' );
			const colors = [ 'purple', 'black', 'red' ];
			$( 'h2' ).css( 'color', function( index ) {
				return colors[ index ];
			});
		};
	});
</script>
</head>
<body>

<button id="btn1">내용</button>
<button id="btn2">변경</button>
<br /><hr /><br />
<h2 class="c1">header-1</h2>
<h2 class="c2">header-2</h2>
<h2 class="c3">header-3</h2>

</body>
</html>

JQuery 예제 - 클래스 속성의 추가 / 삭제 / 토글
- addClass / removeClass / toggleClass
- toggle : 스위치처럼 반복해서 누를때마다 껐다켰다 할 수 있다.
▶ jquery34.jsp 파일 생성 및 코드 작성
<%@ page language="java" contentType="text/html; charset=UTF-8"
    pageEncoding="UTF-8"%>
<!DOCTYPE html>
<html>
<head>
<meta charset="UTF-8">
<title>Insert title here</title>
<style type="text/css">
	.c { color : red; }
</style>
<script src="https://ajax.googleapis.com/ajax/libs/jquery/3.6.4/jquery.min.js"></script>
<script type="text/javascript">
	$( document ).ready( function() {
		document.getElementById( 'btn1' ).onclick = function() {
			$( 'h2' ).addClass( 'c' );
		};

		document.getElementById( 'btn2' ).onclick = function() {
			$( 'h2' ).removeClass( 'c' );
		};

		document.getElementById( 'btn3' ).onclick = function() {
			$( 'h2' ).toggleClass( 'c' );
		};
	});
</script>
</head>
<body>

<button id="btn1">추가</button>
<button id="btn2">삭제</button>
<button id="btn3">토글</button>
<br /><hr /><br />
<h2>header-1</h2>
<h2>header-2</h2>
<h2>header-3</h2>

</body>
</html>
JQuery의 이벤트 구문
$( '이벤트 대상' ).이벤트( function() {
	처리
});

$( '이벤트 대상' ).on( '이벤트', function() {
	처리
});
JQuery 이벤트 예제 1
▶ jquery35.jsp 파일 생성 및 코드 작성
<%@ page language="java" contentType="text/html; charset=UTF-8"
    pageEncoding="UTF-8"%>
<!DOCTYPE html>
<html>
<head>
<meta charset="UTF-8">
<title>Insert title here</title>
<script src="https://ajax.googleapis.com/ajax/libs/jquery/3.6.4/jquery.min.js"></script>
<script type="text/javascript">
	$( document ).ready( function() {
		$( '#btn1' ).mouseover( function() {
			alert( 'btn1 마우스오버' );
		});
		$( '#btn2' ).click( function() {
			alert( 'btn2 클릭' );
		});
		$( '#btn3' ).click( function() {
			alert( 'btn3 클릭' );
		});
	});
</script>
</head>
<body>

<input type="button" id="btn1" value="버튼 1" /><br /><br />
<button id="btn2" />버튼 2</button><br /><br />
<div id="btn3" style="width:200px; height:20px; border:1px solid black">버튼 3</div>

</body>
</html>
JQuery 이벤트 예제 2
- 하나의 버튼에 다른 이벤트 부여하기
▶ jquery36.jsp 파일 생성 및 코드 작성
<%@ page language="java" contentType="text/html; charset=UTF-8"
    pageEncoding="UTF-8"%>
<!DOCTYPE html>
<html>
<head>
<meta charset="UTF-8">
<title>Insert title here</title>
<script src="https://ajax.googleapis.com/ajax/libs/jquery/3.6.4/jquery.min.js"></script>
<script type="text/javascript">
	$( document ).ready( function() {
		// $( '#btn1' ).on( 'click mouseover mouseleave', function() {
			// console.log( 'btn1 마우스 이벤트' );
		// });

		$( '#btn1' ).on({
			'click' : function() {
				console.log( 'click' );
			},
			'mouseover' : function() {
				console.log( 'mouseover' );
			},
			'mouseleave' : function() {
				console.log( 'mouseleave' );
			}
		});
		$( '#btn2' ).on( 'click', function() {
			alert( 'btn2 클릭' );
		});
		$( '#btn3' ).on( 'click', function() {
			alert( 'btn3 클릭' );
		});
	});
</script>
</head>
<body>

<input type="button" id="btn1" value="버튼 1" /><br /><br />
<button id="btn2" />버튼 2</button><br /><br />
<div id="btn3" style="width:200px; height:20px; border:1px solid black">버튼 3</div>

</body>
</html>
JQuery 이벤트 예제 3
- 이벤트를 하나로 묶고 id값으로 구별
▶ jquery37.jsp 파일 생성 및 코드 작성
<%@ page language="java" contentType="text/html; charset=UTF-8"
    pageEncoding="UTF-8"%>
<!DOCTYPE html>
<html>
<head>
<meta charset="UTF-8">
<title>Insert title here</title>
<script src="https://ajax.googleapis.com/ajax/libs/jquery/3.6.4/jquery.min.js"></script>
<script type="text/javascript">
	$( document ).ready( function() {

		/*
		$( '#btn1' ).on( 'click', function() {
			alert( 'btn1 클릭' );
		});
		$( '#btn2' ).on( 'click', function() {
			alert( 'btn2 클릭' );
		});
		$( '#btn3' ).on( 'click', function() {
			alert( 'btn3 클릭' );
		});
		*/

		$( 'button' ).on( 'click', function() {
			alert( 'button 클릭 : ' + $( this ).attr( 'id' ) );
		});

	});
</script>
</head>
<body>

<button id="btn1" />버튼 1</button><br /><br />
<button id="btn2" />버튼 2</button><br /><br />
<button id="btn3" />버튼 3</button><br /><br />

</body>
</html>
JQuery 로 CSV / XML / JSON 형식의 문서 읽기
- csv / xml / json 각 종류를 url과 dataType에 정확히 명시하는것이 중요하다.
▶ 다이나믹 프로젝트 jQueryEx02 생성
▶ webapp 폴더에 data 폴더 생성 후 csv1.jsp / json1.jsp / xml1.jsp 파일 넣기
▶ csv1.jsp
<%@ page language="java" contentType="text/html; charset=UTF-8"
    pageEncoding="UTF-8" trimDirectiveWhitespaces="true"%>
HTML5 + CSS3 입문, 삼국미디어, 유비, 30000원
Javascript + JQuery 입문, 삼국미디어, 관우, 32000원
Node.js 프로그래밍, 삼국미디어, 장비, 22000원
HTML5 프로그래밍, 삼국미디어, 조자룡, 30000원
▶ json1.jsp
<%@ page language="java" contentType="text/plain; charset=UTF-8"
    pageEncoding="UTF-8" trimDirectiveWhitespaces="true"%>
[
   {
      "name":"HTML5 + CSS 입문"
      ,"publisher":"삼국 미디어"
      ,"author":"유비"
      ,"price":"30000원"
   },
   {
      "name":"JS입문"
      ,"publisher":"삼국 미디어"
      ,"author":"관우"
      ,"price":"33000원"
   },
   {
      "name":"Node.js"
      ,"publisher":"삼국 미디어"
      ,"author":"장비"
      ,"price":"32000원"
   },
   {
      "name":"CSS 프로그래밍"
      ,"publisher":"삼국 미디어"
      ,"author":"조자룡"
      ,"price":"30000원"
   }
]
▶ xml1.jsp
<%@ page language="java" contentType="text/html; charset=UTF-8"
    pageEncoding="UTF-8"%>
<books>
	<book>
		<name>HTML5 + CSS3 입문</name>
		<publisher>삼국미디어</publisher>
		<author>유비</author>
		<price>30000원</price>
	</book>
	<book>
		<name>Javascript + JQuery 입문</name>
		<publisher>삼국미디어</publisher>
		<author>관우</author>
		<price>32000원</price>
	</book>
	<book>
		<name>Node.js 프로그래밍</name>
		<publisher>삼국미디어</publisher>
		<author>장비</author>
		<price>22000원</price>
	</book>
	<book>
		<name>HTML5 프로그래밍</name>
		<publisher>삼국미디어</publisher>
		<author>조자룡</author>
		<price>30000원</price>
	</book>
</books>
▶ jquery01.jsp 생성 및 코드 작성
<%@ page language="java" contentType="text/html; charset=UTF-8"
    pageEncoding="UTF-8"%>
<!DOCTYPE html>
<html>
<head>
<meta charset="UTF-8">
<title>Insert title here</title>
<script src="https://ajax.googleapis.com/ajax/libs/jquery/3.6.4/jquery.min.js"></script>
<script type="text/javascript">
	// ready = window.onload()
	$( document ).ready( function() {
		$( '#btn' ).on( 'click', function() {
			// alert( 'btn 클릭' );
			$.ajax({
				url : './data/json1.jsp',
				type : 'get',
				dataType : 'json',
				success : function( csvData ) {
					console.log( '성공 :', typeof csvData );
					console.log( csvData );
				},
				error : function( err ) {
					console.log( '실패', err.status );
					console.log( '실패', err.responseText );
				}
			})
		});
	});
</script>
</head>
<body>

<button id="btn" />요청</button>
<br /><hr /><br />

</body>
</html>
JQuery 예제 - XML 형식의 문서 데이터 추출
- XML 형식의 문서 데이터를 추출해서 출력하기
- 가능하면 jQuery의 구문을 사용하기
▶ jquery02.jsp 생성 및 코드 작성
<%@ page language="java" contentType="text/html; charset=UTF-8"
    pageEncoding="UTF-8"%>
<!DOCTYPE html>
<html>
<head>
<meta charset="UTF-8">
<title>Insert title here</title>
<script src="https://ajax.googleapis.com/ajax/libs/jquery/3.6.4/jquery.min.js"></script>
<script type="text/javascript">
	// ready = window.onload()
	$( document ).ready( function() {
		$( '#btn' ).on( 'click', function() {
			// alert( 'btn 클릭' );
			$.ajax({
				url : './data/xml1.jsp',
				type : 'get',
				dataType : 'xml',
				success : function( xmlData ) {
					let html = '<table>';
					$( xmlData ).find( 'book' ).each( function() {
						html += '<tr>';
						html += '<td>' + $( this ).find( 'name' ).text() + '</td>';
						html += '<td>' + $( this ).find( 'publisher' ).text() + '</td>';
						html += '<td>' + $( this ).find( 'author' ).text() + '</td>';
						html += '<td>' + $( this ).find( 'price' ).text() + '</td>';
						html += '</tr>';
					});
					html += '</table>';

					$( '#result' ).html( html );
				},
				error : function( err ) {
					console.log( '실패', err.status );
				}
			})
		});
	});
</script>
</head>
<body>

<button id="btn" />요청</button>
<br /><hr /><br />
<div id="result"></div>
</body>
</html>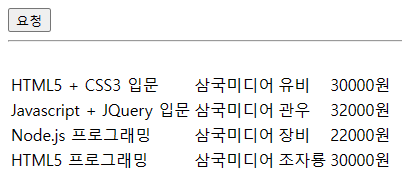
JQuery 구문을 활용하여 우편번호 검색기 만들기